Introduction
In this article, we'll learn how to use the NGX spinner library in Angular 8 to show the Loader. Ngx spinner is an Angular library for loading spinners. Its purpose is to let the user know that data is being loaded. A loader is mainly used to show an application's state of loading data.
Prerequisites
- You should know the basics of Angular 2 or higher.
- Visual Studio Code
- Visual Studio & SQL Server Management Studio
- Node & NPM installed
- Bootstrap
Step 1
Below command will help you to create an Angular project.
ng new Angularloader
Step 2
Open this project in Visual Studio Code, and then use the following command to install Bootstrap.
npm install --save bootstrap
Now, open the styles.css file and add a reference to the Bootstrap file. Add this line to the styles.css file to add a reference.
@import '~bootstrap/dist/css/bootstrap.min.css'
Step 3
Now, add the ngx-spinner library to this project. Use the following command to add the ngx-spinner library.
npm install --save ngx-spinner
Step 4
Now Update app.module.ts
Open the app.module.ts file and add Import NgxSpinnerModule to the root module.
import { BrowserModule } from '@angular/platform-browser';
import { NgModule } from '@angular/core';
import { AppRoutingModule } from './app-routing.module';
import { AppComponent } from './app.component';
import { HttpClientModule } from '@angular/common/http'
import { EmployeedetailsComponent } from './employeedetails/employeedetails.component';
import { NgxSpinnerModule } from "ngx-spinner";
@NgModule({
declarations: [
AppComponent,
EmployeedetailsComponent
],
imports: [
BrowserModule,
AppRoutingModule,
HttpClientModule,
NgxSpinnerModule
],
providers: [],
bootstrap: [AppComponent]
})
export class AppModule { }
Step 5
Now, use the following command to create a new component.
ng g c Employeedetails --spec=false
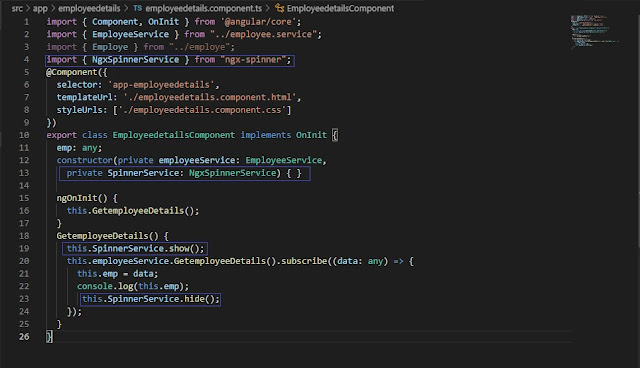
Now open employeedetails.component.ts file and import NgxSpinnerService.
import { OnInit, Component } from '@angular/core';
import { EmployeeService } from '../employee.service';
import { Employe } from '../employe';
import { NgxSpinnerService } from 'ngx-spinner';
@Component({
selector: 'app-employeedetails',
templateUrl: './employeedetails.component.html',
styleUrls: ['./employeedetails.component.css']
})
export class EmployeedetailsComponent implements OnInit {
emp: any;
constructor(private employeeService: EmployeeService,
private SpinnerService: NgxSpinnerService) { }
ngOnInit() {
this.GetemployeeDetails();
}
GetemployeeDetails() {
this.SpinnerService.show();
this.employeeService.GetemployeeDetails().subscribe((data: any) => {
this.emp = data;
console.log(this.emp);
this.SpinnerService.hide();
});
}
}
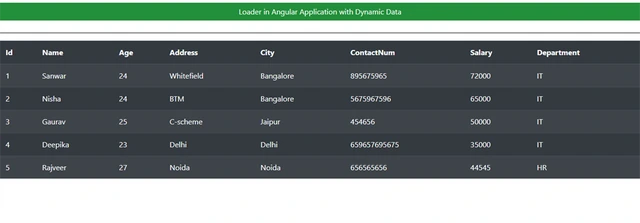
Open the file employeedetails.component.html and add the lines below.
<div>
<div class="row" style="margin-top:10px;margin-bottom: 10px;">
<div class="col-sm-12 btn btn-success">
Loader/Spinner in Angular Application Along With Dynamic Data
</div>
</div>
<div class="row" style="margin-top:10px;margin-bottom: 10px;">
</div>
</div>
<hr style="background-color:black" />
<div>
<table class="table table-dark table-striped">
<thead>
<tr>
<th>Id</th>
<th>Name</th>
<th>Age</th>
<th>Address</th>
<th>City</th>
<th>ContactNum</th>
<th>Salary</th>
<th>Department</th>
</tr>
</thead>
<tbody>
<tr *ngFor="let e of emp">
<td>{{e.Id}}</td>
<td>{{e.Name}}</td>
<td>{{e.Age}}</td>
<td>{{e.Address}}</td>
<td>{{e.City}}</td>
<td>{{e.ContactNum}}</td>
<td>{{e.Salary}}</td>
<td>{{e.Department}}</td>
</tr>
</tbody>
</table>
</div>
<ngx-spinner bdColor="rgba(51, 51, 51, 0.8)" size="default" type="ball-spin-clockwise">
<p style="color: white">Please Wait...</p>
</ngx-spinner>
Step 6
Use the following command to create a new class:
ng g class Employe --spec=false
Now open the employe.ts file and add the following line to this class:
export class Employe {
Id: number;
Name: any;
Age: any;
Address: any;
City: any;
ContactNum: number;
Salary: number;
Department: any;
}
Step 7
Below command will help you to create a new service in the Loader/Spinner application:
ng g class Employe --spec=false
Now open the file employee.service.ts and add the lines below:
import { Injectable } from '@angular/core';
import { HttpClient } from '@angular/common/http';
@Injectable({
providedIn: 'root'
})
export class EmployeeService {
url: any;
constructor(private http: HttpClient) {
}
async GetemployeeDetails() {
this.url='http://localhost:56932/api/Employee/Employeedetails';
return this.http.get(this.url);
}
}
Step 8 - Create a Table & Database
Open SQL Server Management Studio, Make a database called "Employee," & then create a table in that database. Use a name like "employee" for that table.
Create a new "Web API" project
Step 9
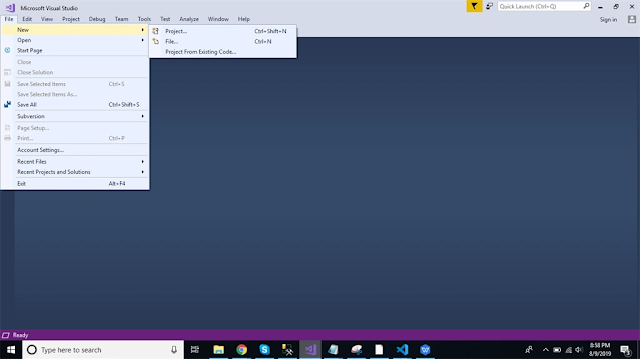
Open Visual Studio Editor and then Create a new project.
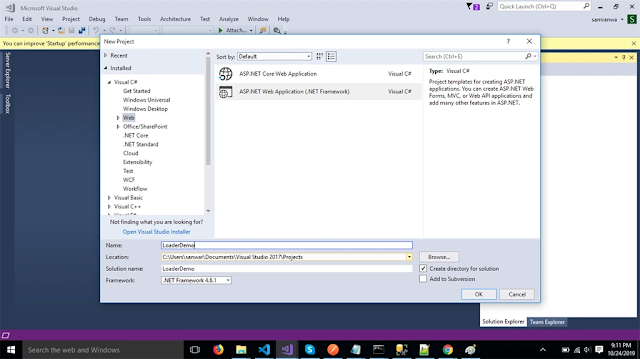
Step 10
The name should be changed to LoaderDemo.
Step 11
Pick the Web API template.
Step 13
Click "Add" which is next to the "ADO.NET Entity Data Model".
Step 14
Choose EF Designer from the list of programs and click "Next."
Step 15
Add the connection settings, then on the next page, choose the database name and click OK.
Step 16
Check the box next to "Table." The default will be to choose the internal options. Now, click the button that says "Finish."
Step 17
Right-click on the folder "Controllers" and click "Add New Controller." Name it "Employee controller," and then add the following namespace.
using LoaderDemo.Models;
Step 18
Now, add a way to fetch information from the database.
Employee controller
using System;
using System.Collections.Generic;
using System.Linq;
using System.Net;
using System.Net.Http;
using System.Web.Http;
using LoaderDemo.Models;
namespace LoaderDemo.Controllers
{
[RoutePrefix("Api/Employee")]
public class EmployeeController : ApiController
{
[Route("Employeedetails")]
[HttpGet]
public object Studentdetails()
{
EmployeeEntities DB = new EmployeeEntities();
var emp = DB.Employees.ToList();
return emp;
}
}
}
Step 19
Now, let's enable CORS. Go to Tools, open NuGet Package Manager, search for "CORS," and then install the "Microsoft.Asp.Net.WebApi.Cors" package. Open the file Webapiconfig.cs and add the lines below.
EnableCorsAttribute cors = new EnableCorsAttribute("*", "*", "*");
config.EnableCors(cors);
Step 20
Now start the project and see what happens.
Summary
In this article, we learned how to add a dynamic data load Loader to an Angular application.


